Records
Records are used when it is important to collect more information. Creating record templates will help both tutors and learners give the right information in their records. You can also link distribution list so that different types of records automatically get sent to different groups of people.
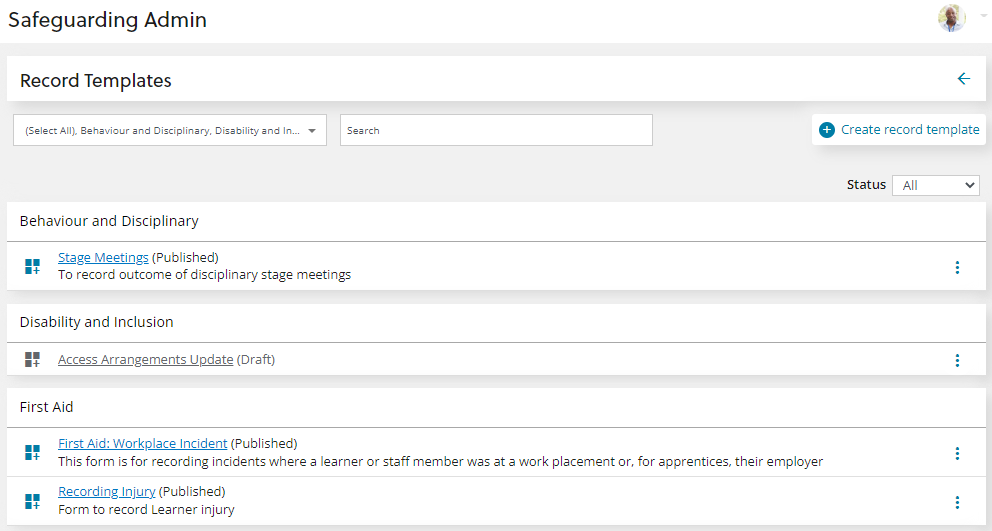
Create a record template
To create a new template select the + Create Record Template button.
This takes you to the create record template page, where you can set up the template to suit your needs.
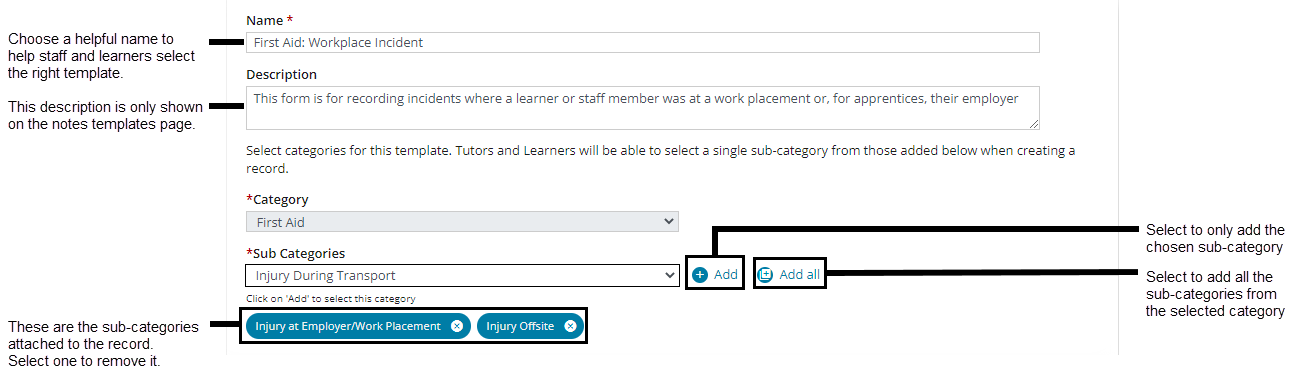
Basic details
-
Give your record a Name .
-
(optional) Add a description of the record. This description is only shown on the record template page.
-
Select a category from the drop down.
-
To add all the sub-categories in the category to the record select +add all .
-
To add a single sub-category select it from the drop down and then select + add .
-
To remove a sub-category select its name.
-
Notifications
In this section you can control the default state of the record and how it will interact with your out of hours notifications settings.
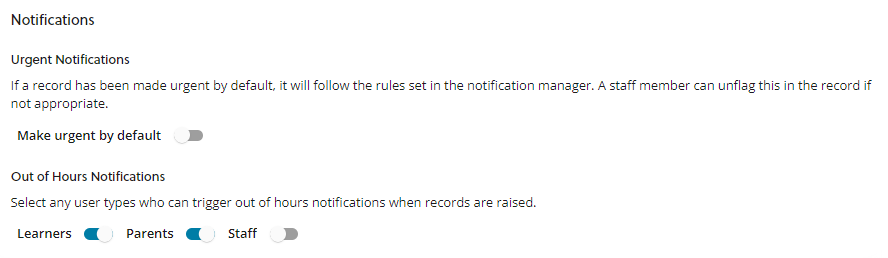
Make urgent by default - When turned on, the record will begin marked urgent. The person who makes the record can choose to mark it as non-urgent when they are filling in the template.
Out of hours notifications - Records submitted between certain hours might indicate that there is an urgent safeguarding concern. You can choose to be notified of an out of hours submission based on the group the reporter belongs to. For instance you might be interested in out of hours reports from learners, and parents, but not tutors. In that case you would only turn on the Learners and Parents toggles.
Create
In this section you can specify who is allowed to create this type of record.
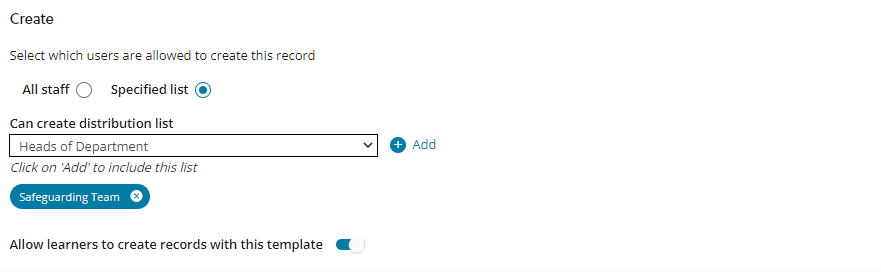
All Staff - When you select this option the record template will be available to all staff.
Specified List - When you select this option a drop down list of your distribution lists is shown. You can add as many as you want by choosing the distribution list from the drop down then selecting + Add . To remove a distribution list select the name of the list you want to remove.
Allow learners to create records with this template - When this is turned on any learner will be able to add a record using this template.
Notify
In this section you can choose the default settings for the template.
Add staff to send and copy notifications to using distribution lists, or by selecting+ Add Staff . Then use the search function to add as many staff members as you require.
Use the toggles to add staff with specific connections to the selected learner.
Send to UIO teacher - If selected this uses the learner's enrolment record and notifies any UIO staff linked to their curriculum.
Send to enrolment supervisor - If selected this adds any staff who are linked to the learner's enrolment record as ILP tutors. This could be a personal tutor or an assessor depending on how the ILP is set up.
Send to the register staff -If selected this uses the person function reference data. A notification is sent to people attached to the learner's registers who also have a role with a tick in the Safeguarding column.
Send to the department heads - If selected this uses the learner's enrolment record and adds any head of department linked to the Organisation record of the learner's curriculum.
View
In this section you can identify who can view the risk after it has been sent.
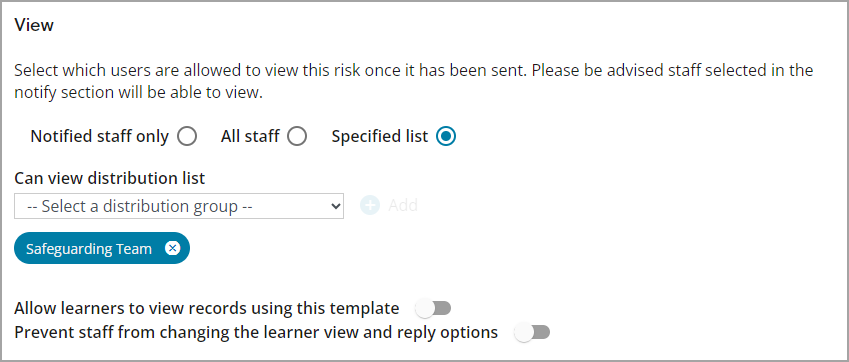
Notified staff only - When selected only staff who are sent notifications of risks made with this template will be able to view them.
All staff - When selected all staff with the safeguarding tutor role be able to view risks made with the template, even if they were not notified about it. So if they search for a learner risks made with this template will show up.
Specified list - When selected you can add a distribution list to allow more staff to view risks made with this template. This is useful for staff who need to be able to see these risks but don't need to be notified.
Allow learners to view records with this template - If selected learners who are the subject of risks made with this template will be able to view them. They will also be able to view any comments or responses that are added to the risks.
Prevent staff from changing the learner view and reply options - If selected staff using this template will be unable to change if a learner can view or reply. This can help you ensure the right levels of visibility for different risk types.
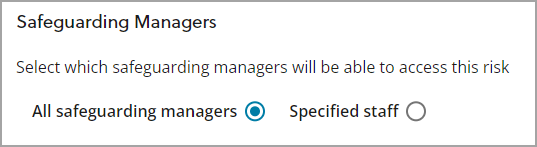
Safeguarding managers
In this section you can choose which safeguarding managers will have access to risks raised with this template. This allows you to limit the sharing of some information when necessary.
Template Builder
In this section you can decide what the record will actually look like. You can add a body map, text boxes, guide text, question and answers, and the option to upload documents. You can also change the layout of the page to add columns and rows to organise these elements exactly as you need.
There are two views you can choose between when building your template. When the layout toggle is turned on you will see that there are three layers.
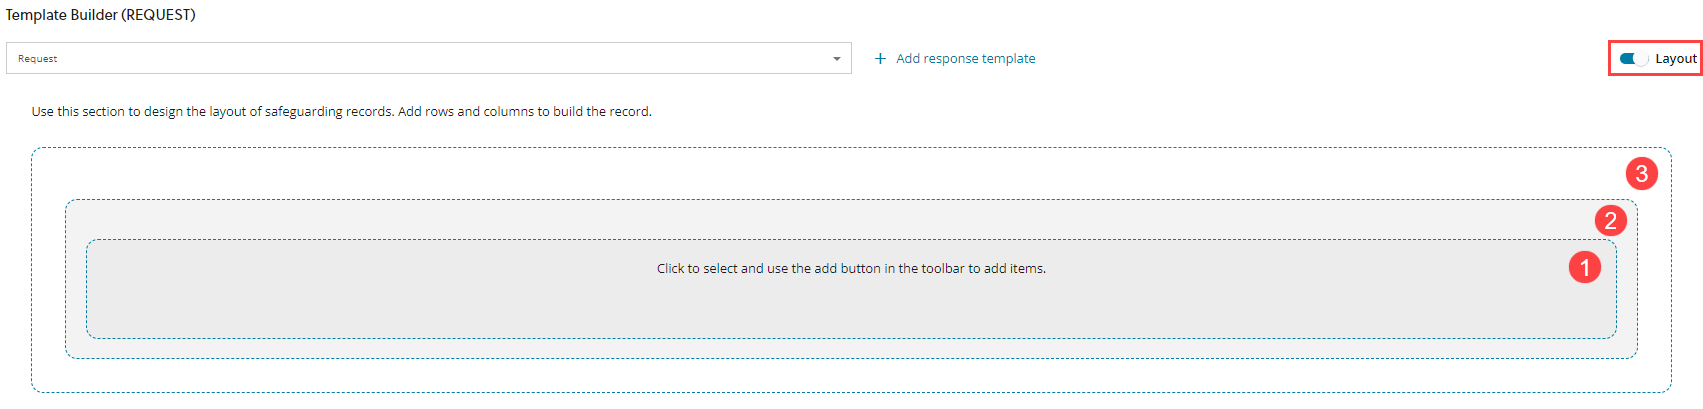
When you turn off the layout toggle there will only be one layer.

In both versions the layer labelled 1 is where you can add items to your template. You can find more information about the items below.
Layer 2 lets you add another column into that section of content
Layer 3 lets you add more rows of content.
When you select on each layer you will see a menu pop-up offering you actions you can perform from that layer. The options depend on the layer selected and what it already contains.
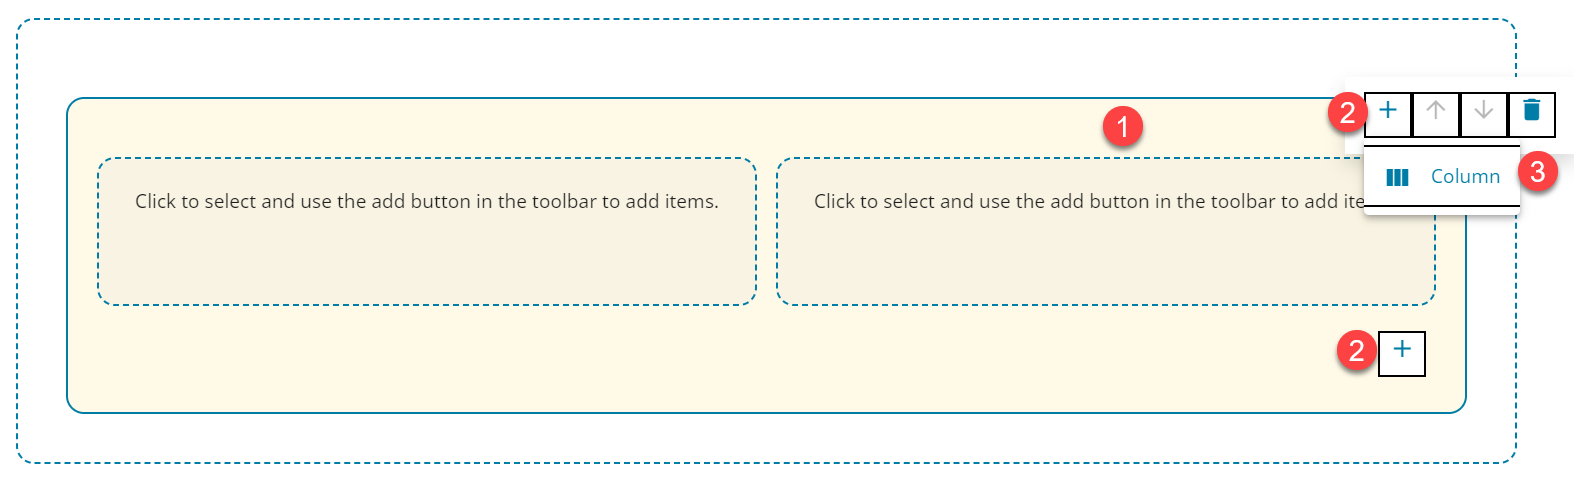
Add columns and rows
Add columns
-
Ensure the layout toggle is on.
-
Select the middle layer (labelled 2 above).
-
Select either of the + buttons that appear. They both do the same thing.
-
Select the column button.
-
(optional) Change the position of the new column by selecting it and using the arrow buttons .
You can add as many columns as you wish but if there are too many they will start to form a second row.
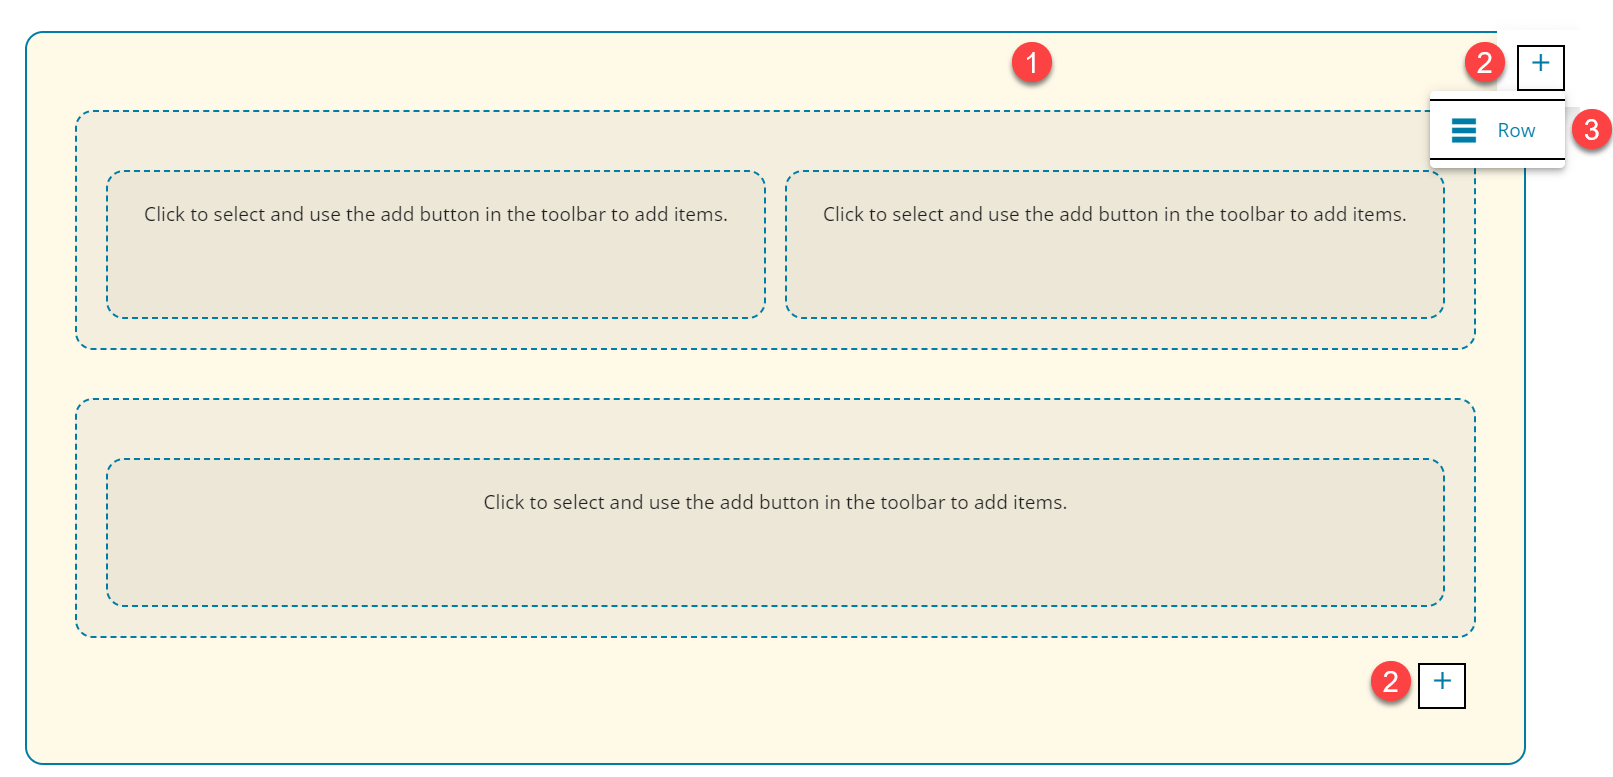
Add rows
-
Ensure the layout toggle is on.
-
Select the outer layer (labelled 3 above).
-
Select either of the + buttons that appear. They both do the same thing.
-
Select the row button.
-
(optional) Change the position of the new row by selecting it and using the arrow buttons .
You can add as many rows as you need.
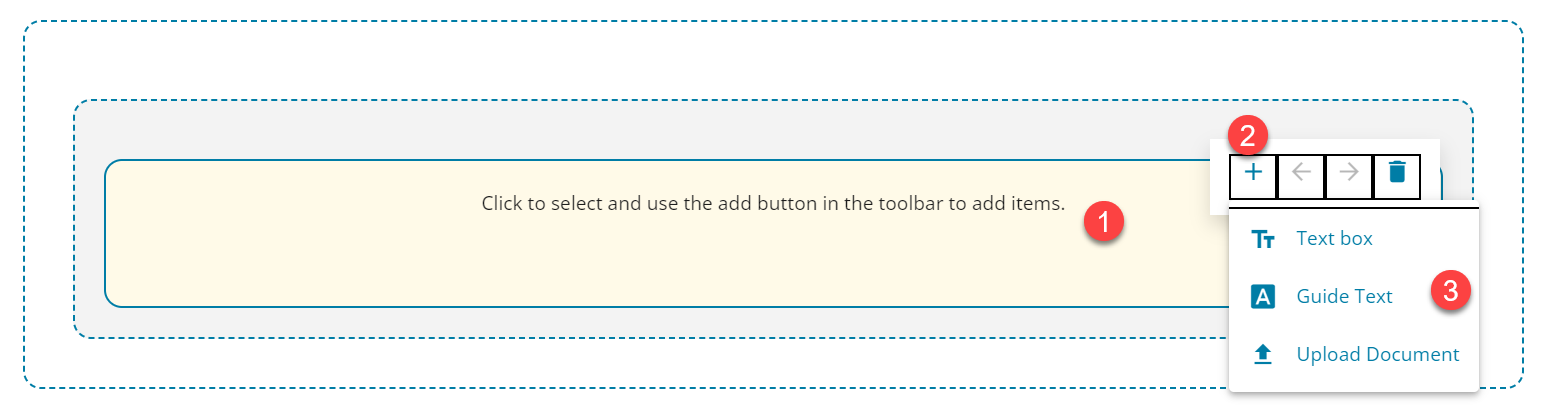
Add items
Items are what staff and learners will see when they use the template. You can use them to give instructions or provide space for input.
To add an item to your template:-
-
Select the innermost layer (labelled 1).
-
Select the + button.
-
Select the item you want to add.
-
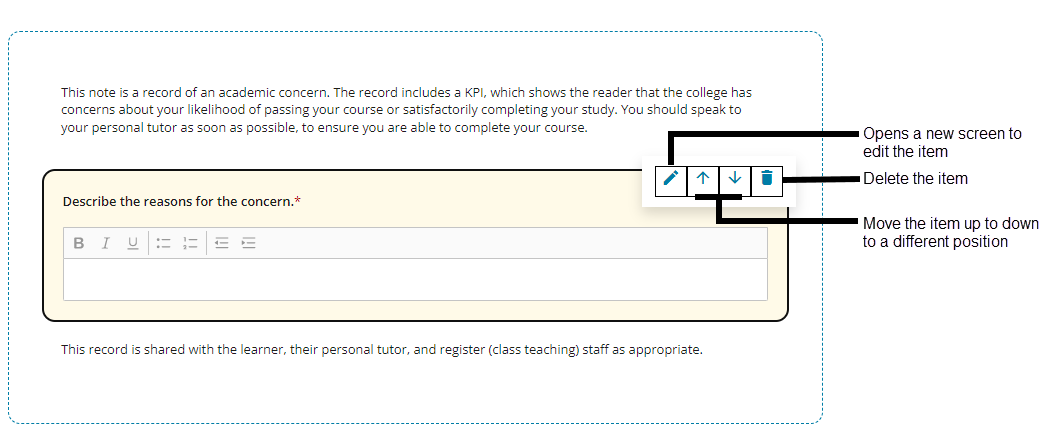
Select the new item and then the edit button. This lets you modify the item as you need.
-
After making your edits select Save to keep the changes or select the x to abandon them.
Bodymap
Adding a body map to your template will allow the reporter to mark any number of locations on a body map. For example this is good for injury reports.
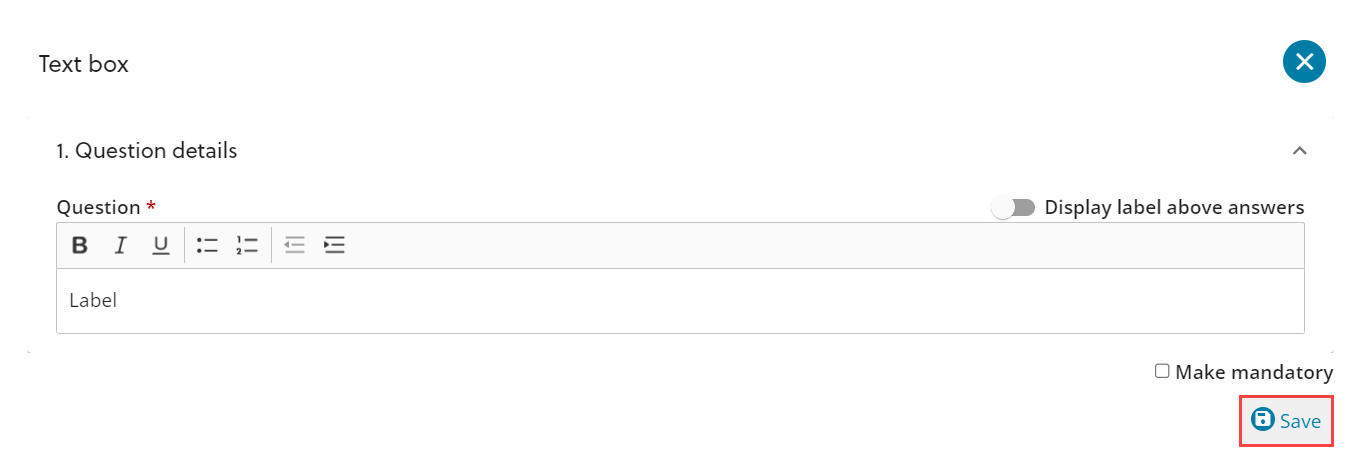
Text Box
The text box item adds a text box that the person completing the note will fill in. It also has a label so you can add some information to the box. In the edit menu for this item you can:-
-
change the label text
-
change the label location - above or next to the text box
-
Make completing the text box mandatory
Guide text
The guide text item lets you add extra information to the template. This is useful for adding instructions or guidance as needed. Simply add your text in the edit box and save .
Question and Answers
A good way to get the information you need is to ask specific questions and make it easy to give the answers. With the question and answers item you can ask questions and decide how the answer is given.
For all the answer types you can add a question, and choose if the question is mandatory.
The different types of answer are:-
Text - There will be a text box to complete on the form.
Number - The reporter will be able to select a number only.
Dropdown - You can identify a set of options which will appear in a drop down menu, and the reporter can select one.
Radio Button - You can identify a set of options which will appear in a list, and the reporter can select one.
Checkbox - You can identify a set of options which will appear in a list, and the reporter can select one or more options.
Date - You can choose to ask for a single date or a date range . The reporter will be able to pick dates from a calendar to make it easy.
Time - The reporter will be able to select a time in hours and minutes.
Upload document
The upload document item lets you add a simple upload interface. This gives an easy option for staff or learners to add documents to the record.
On the edit screen you can edit the informational text above the uploader. You also have the option to make uploading something mandatory.
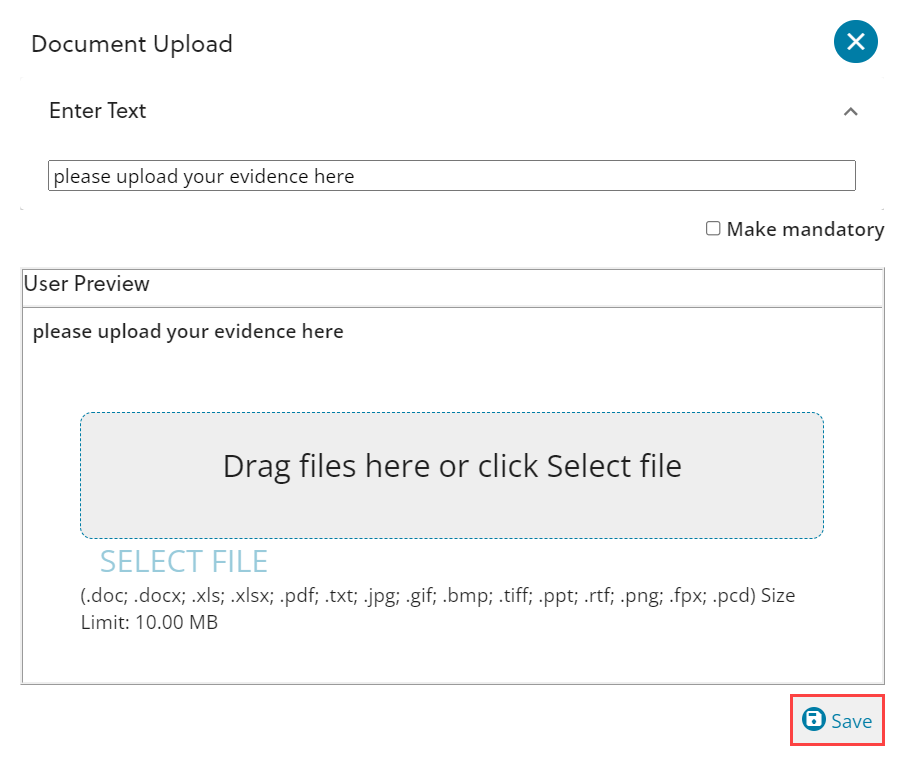
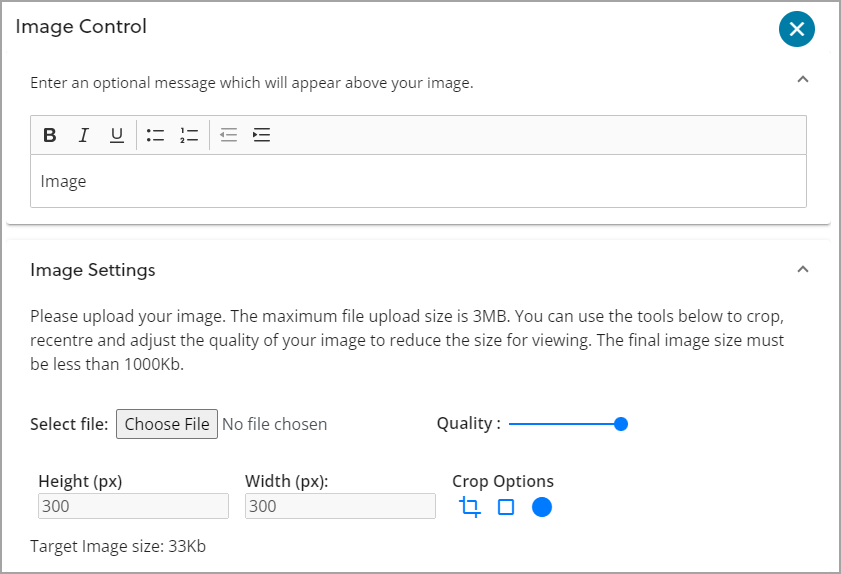
Image control
The image control lets you add images to a template. This can help to share information in a more concise way that just using words.
Inside the editor for the image control you can
-
add an option message to appear above the image
-
upload your image
-
chose the size and shape of the image
-
view a preview of how your image will appear
Add a response
If you want to allow readers to respond to the record you can also create a template for that. This can be a good way to get follow up information to support the record. If a response is added anyone who is notified of the record will be able to complete the response form.
Select the+ Add response template button.

A new blank template is added. You can then edit this template in the same way as the original template. The title next the template builder will change to reflect which template you are working on.
Use the drop down menu to switch between the two templates.
If you want to remover the response template select Remove response template .

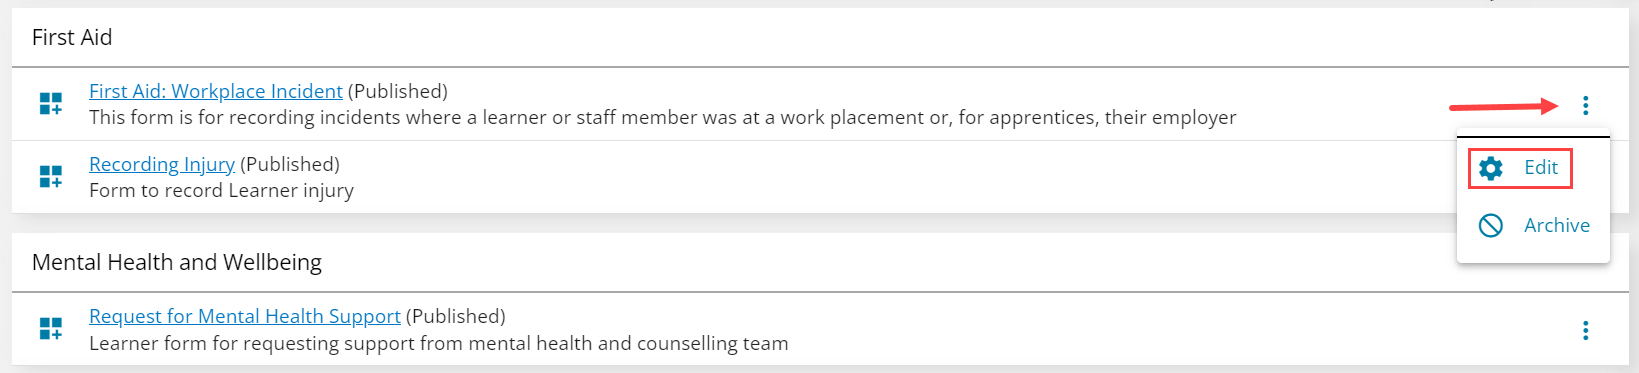
Edit a record template
To edit a template you can either select on the name of the template or select the Menu button next to the template, then Edit .
You can then follow the instructions for creating a template to make your changes.
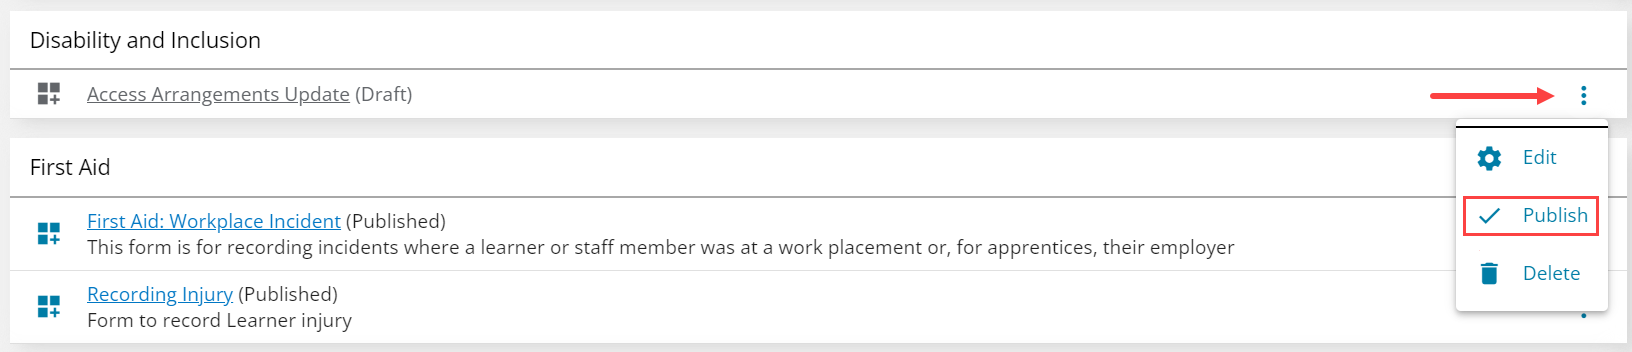
Publish a record template
Once you publish a template everyone with permission will be able to use it. You can publish a template in two ways. The first option is to select the Publish button at the bottom of the create template page.

The second option is to select the menu button next to the template, then Publish .
Search for a record template
If you have a lot of record templates you might want to check what already exists to avoid making overlapping ones. You can search for a keyword to see if a template already exists or you can filter by the assigned categories to only view the ones you are interested in.
Remove a record template
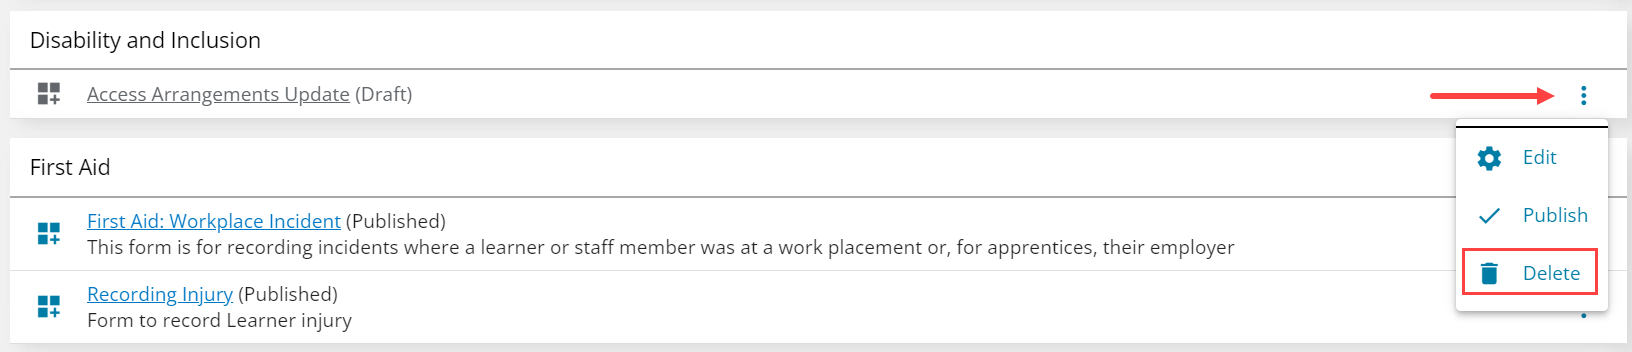
Delete
A template can only be deleted if it has never been used. You can find the Delete option by selecting the menu button next to the template.
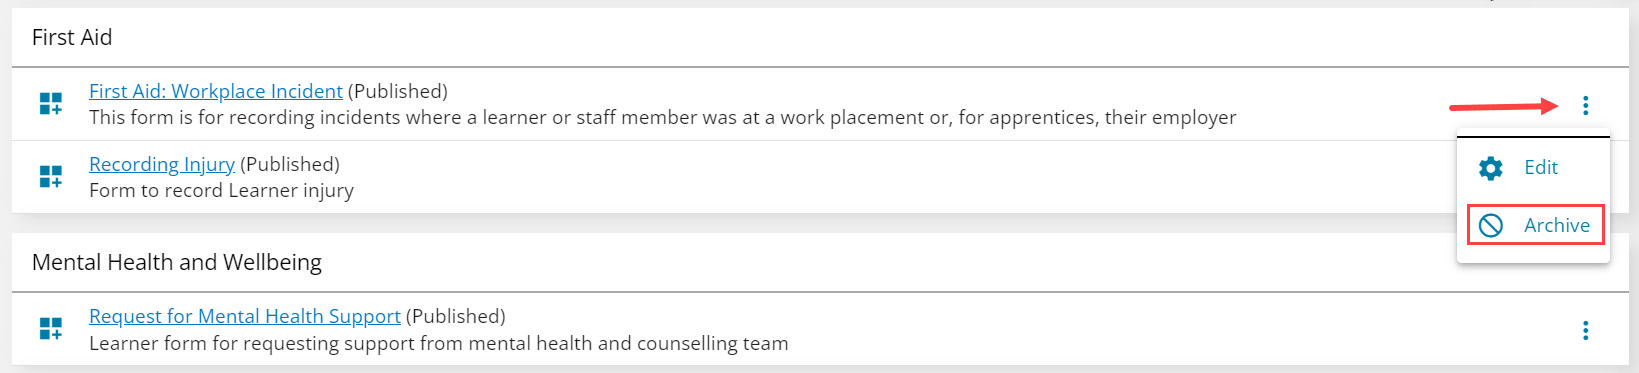
Archive
If you want to remove a template after it has been published, you can archive it. Select the menu button, next the template you want to remove and then select Archive .
Re-publish
Archived templates can be republished. Select the menu button next the template you want to re-publish, then select Re-publish .
